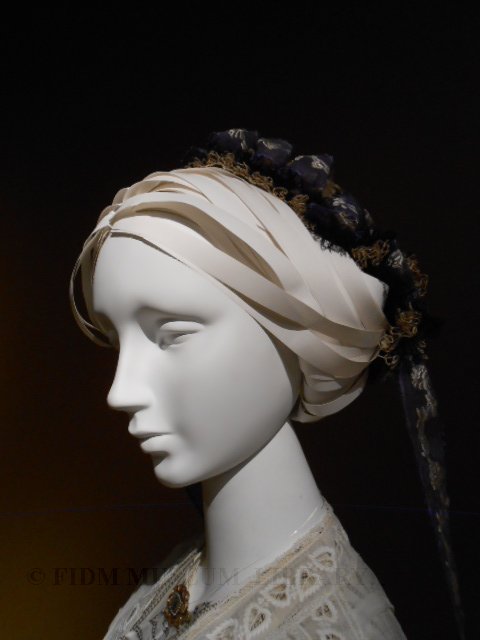
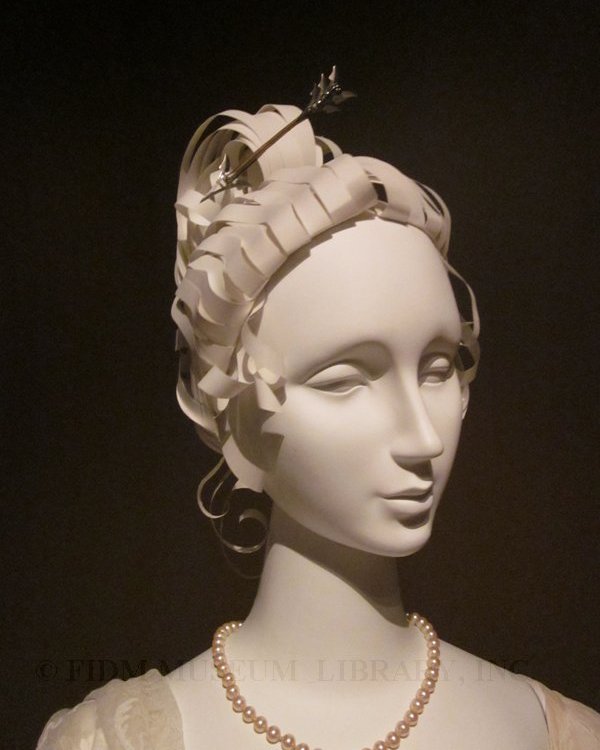
First published in February 2013, the 3rd most popular post of 2013 describes how we create stunning paper wigs for exhibitions. Based on period hairstyles found in magazines, fashion plates, paintings, and photograph, paper wigs help create the total look of a dressed mannequin. Use this detailed how-to to create a wig based on your favorite era. If you do try your hand at making a paper wig, be sure to send us a picture!
**********
When dressing a mannequin for exhibition, it's important not to overlook the details. Careful attention to the total look makes an ensemble, and an exhibition, complete. Fully dressed mannequins also help visitors better understand the time-period on display. Once we've selected a garment for inclusion in an exhibition, we consider accessories. Is jewelry appropriate? Should she carry a handbag? What about shoes? And most importantly…what about hair?
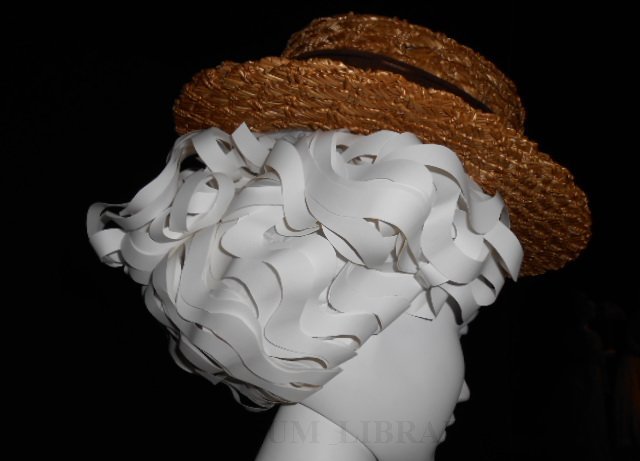 Curly hair c. 1895 topped with a straw boater. The waves were created by cutting paper on curved lines. To keep the curls from appearing limp, individual strands of hair were curled with a pencil.
Through trial and error, we've developed an inexpensive and relatively simple way to create paper wigs. The first step, of course, is research. What period will the mannequin represent? Using the date of the garment, research period images (if available), or other artistic representations of hairstyles. Useful sources can include fashion plates, photographs, paintings, and magazines. Many images can be found online, but don't forget to reference print sources. Once you've determined the desired look of your wig, get yourself a pad of 14×17 inch 70 lb drawing paper.
Remove a sheet of paper from the pad, fold on a diagonal angle, and cut along the fold. Leaving a 1/2 inch edge, cut 3/8 to 5/8 inch wide strips. It's important to leave a 1/2 inch margin, as it will be used to help anchor the hair to the mannequin. Straight cuts approximate straight hair, while curved lines create waves. We sometimes use pinking shears to create added texture.
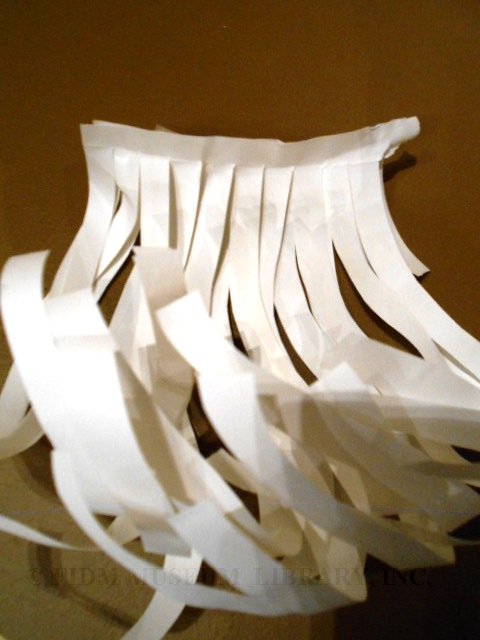
Hair cut from 70 lb drawing paper. Note the uncut edge, which is important for attaching the hair to the mannequin. It also helps in creating a believable hairline and part.
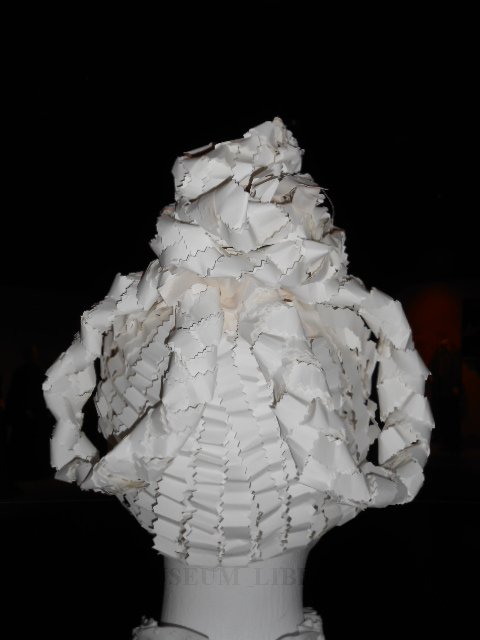
Paper wig made with pinking shears.
As you build the wig, keep the desired hairline in mind. We've found that if you don't pay attention to creating a natural hairline, the wig can look odd. It also helps to remember that you're not making hair; you're making an abstract interpretation of hair. In other words, you're sculpting. And you're not creating a perfect hairstyle. Even paper hair appears more natural when it's very slightly imperfect and asymmetrical.
Once you've cut several segments of hair, begin attaching them to the mannequin. If we're making a particularly elaborate wig, one we hope to keep for a long time, we'll sometimes use a plain juliet cap for the foundation. Usually, we work directly on the mannequin. We generally use scotch tape, but you might want to experiment with different tapes, depending on your mannequin finish.
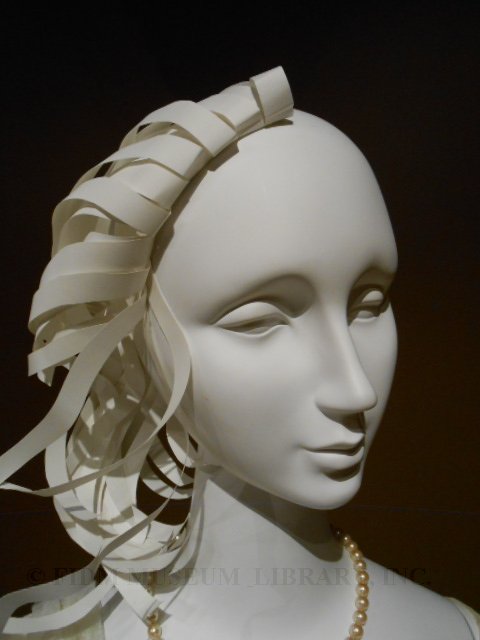
The 1/2 inch margin uncut is taped along the hairline, disappearing when the strands of hair are pulled back. If a part is desired, the margin can be taped to approximate a part.
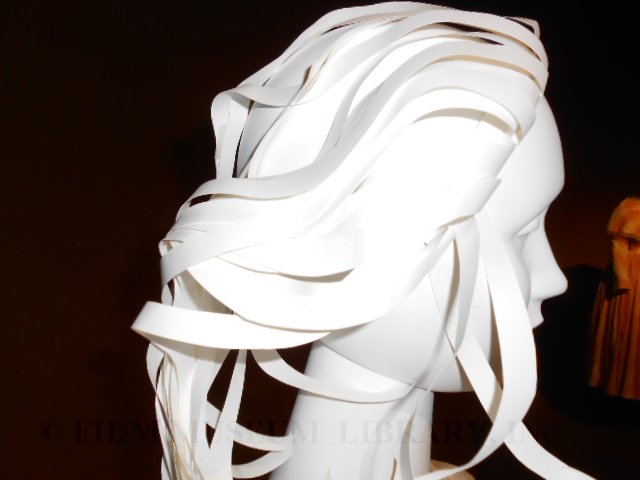 Note that a few strands fall forward; these pieces will be curled. This hair will have a bit of extra decoration, but no hat. When you're building the wig, don't forget to consider if you'll be including hats, veils or other headwear.
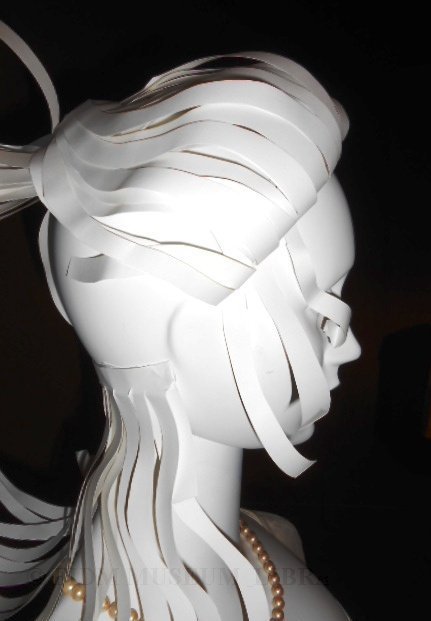
Front hair has been pulled back and taped together, creating a topknot. The long strands at the nape will be pulled up, filling out the hairstyle. If a hairstyle is particularly full, you might consider creating a tissue paper rat, a slightly crumpled wad of paper placed inside the hairstyle, creating additional fullness. This technique was used on the c. 1895 wig pictured above.
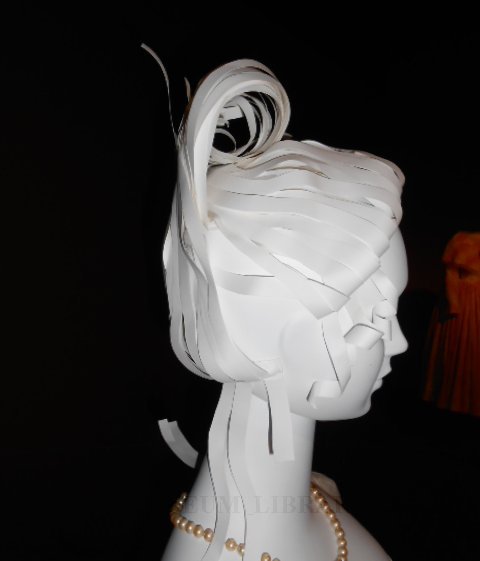
To form the topknot, strands are pulled up, and taped in place. The front curls were created with an extremely low tech tool: a #2 pencil.
As you're forming the wig, remember the layout of your gallery. Will the wig only be seen from the front, or will it be seen in the round? You'll probably want to concentrate your energy on the portion of the wig that will be most obvious to visitors, but don't ignore the rest. You can't create a belivable wig unless you incorporate all angles.
Ta-da! She's finished! Kevin used a wonderful arrow hairpin to complete the wig, but you can also use artificial flowers, ribbon or other ornaments. This wig, along with the others seen in this post, is currently on display in A Century of Cotton: Selections from The Helen Larson Historic Fashion Collection, 1800-1900, now on view in our Larson Gallery. Plan a visit and view these wigs in person!

